IoT Control Centre - Control all your smart devices from a single dashboard
Overview
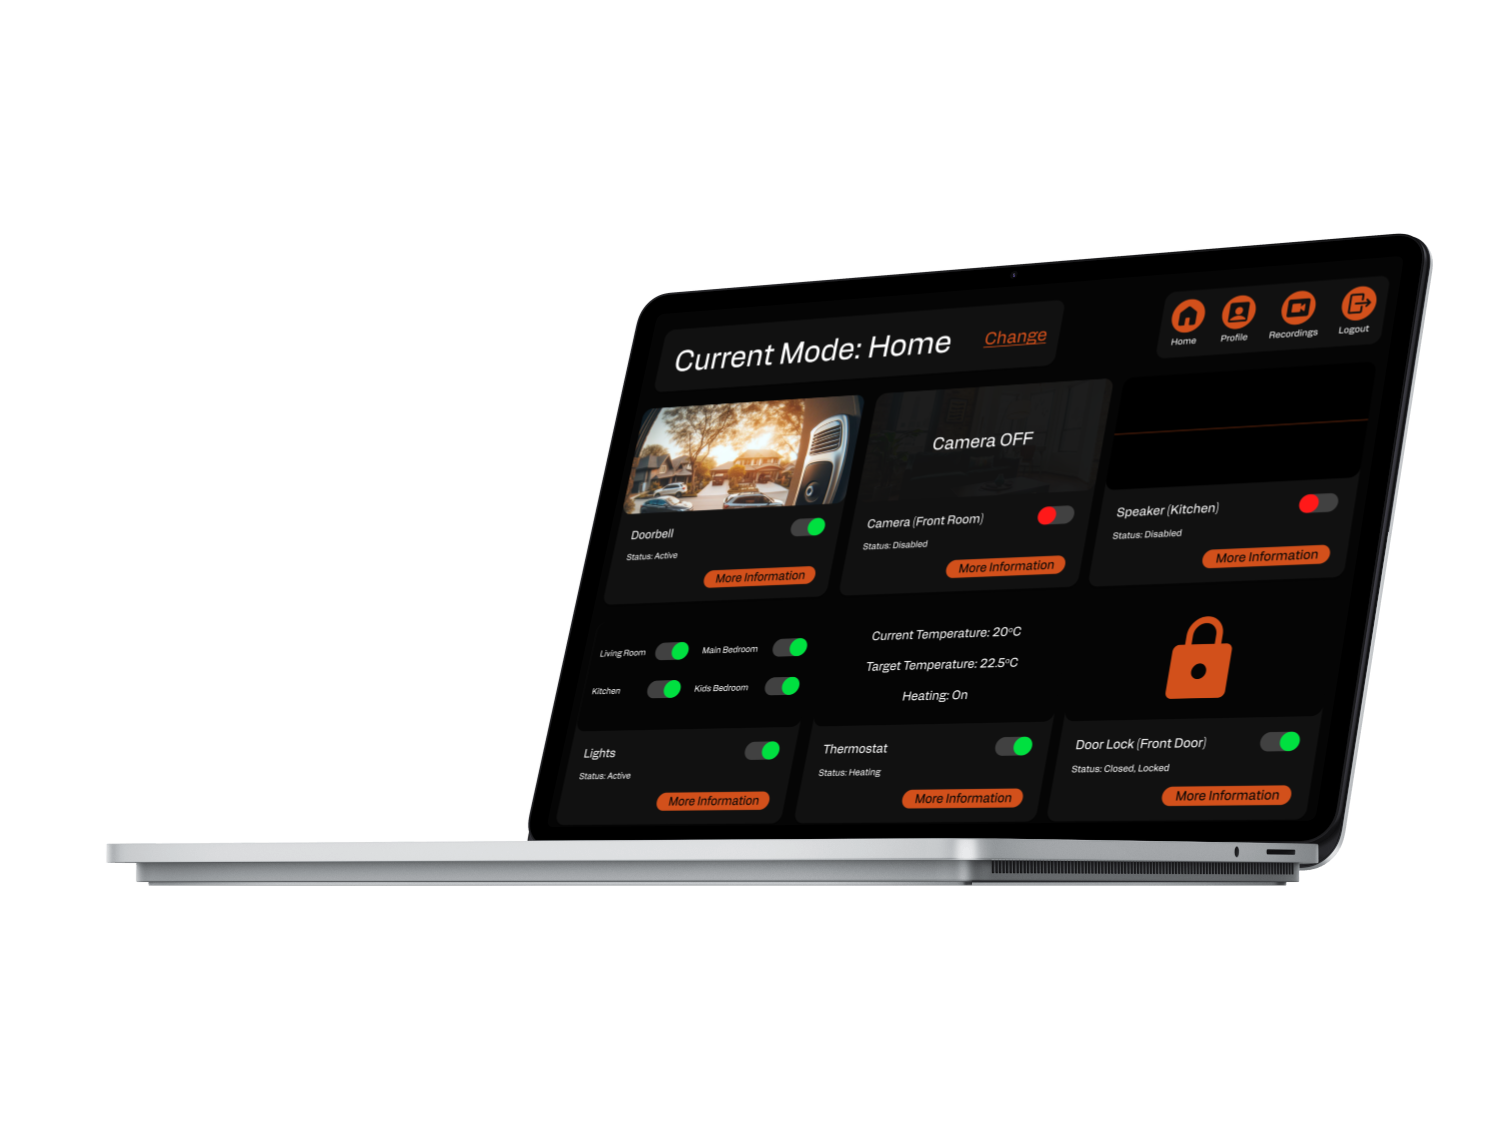
A desktop dashboard that allows the user to control six Internet of Things devices for home security. The dashboard also providesd alerts about strange activity and a user can view the information about the alert and take action (such as contacting the police) if required. Different modes are available and users can set whether they are at home or out and this will automatically apply presets to each device.
The Problem
Many people own a number of IoT devices, they are also concerned about the security of their homes. Smart Devices have a number of sensors built-in which could be used to offer additional security, but there is no way of controlling all the devices from a single platform for this purpose.
Users and Audience
Tech-savvy individuals who own a number of IoT devices and want to use them to increase their home security.
My Role
All aspects of the design process from research and discovery to final prototype.
Requirements
To design a Desktop UI that could control six IoT devices and deliver a 20 minute presentation on the final design.
Project Length
2 Weeks
Research & Discovery
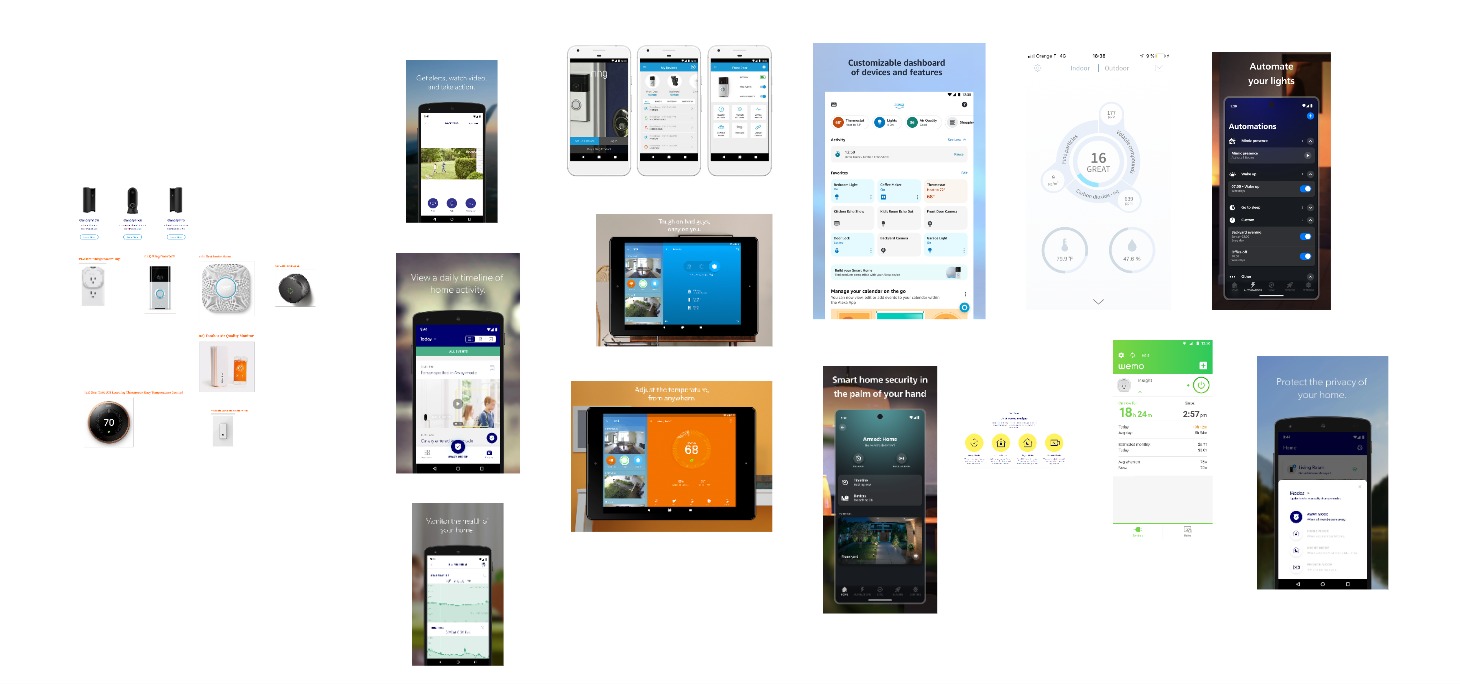
This project had a very tight deadline so I had no time to lose, I started by completing a competitor analysis to get a good understanding of what IoT products were already available. As I was interested in home security I concentrated on devices such as cameras and speakers that had clear security potential. I also took time to assess the apps that pair with each device, so I could see the standard elements of these UIs and where there may be improvements.
I used the brief and what I had learned from this research to develop problem statements for the project. I came up with two problem statements to inform the rest of my research and design.
Here are my problem statements:
- I am a homeowner, trying to keep my home secure but I often work late in my job which cause me anxiety that my house may get broken into.
- I own a number of IoT devices and I want to make my home more secure but I’m not sure if my smart devices can help as they are not advertised for security. This frustrates me as I am sure they could help and I need a way to use them for this purpose.
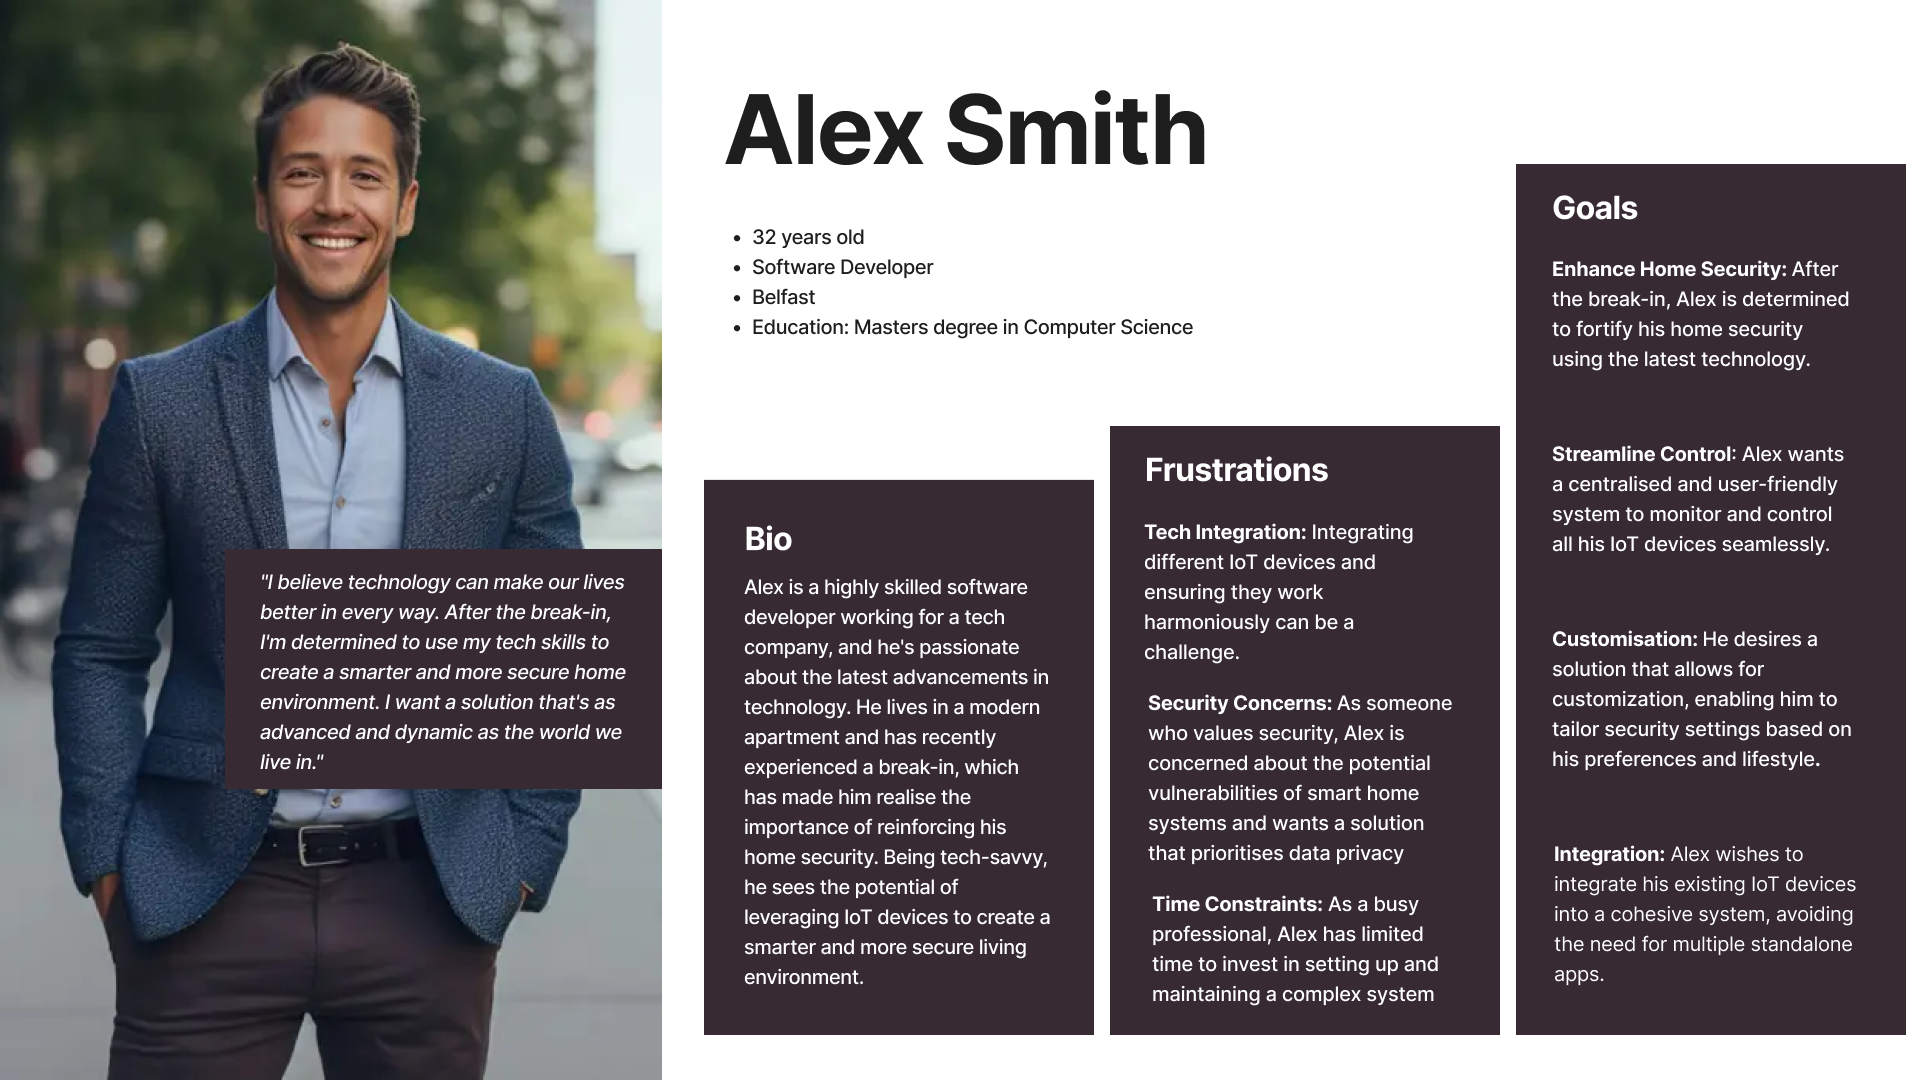
As I did not have time to complete user surveys or interviews I used ChatGPT to help me create a user persona. I used information from the brief and problem statements to create my prompt. I used the reply to create a user persona.
I wanted to get a better idea for how my users would feel and think so I decided to create an empathy map. This process really helped me to think of what my users would need and want from a control centre for their IoT devices
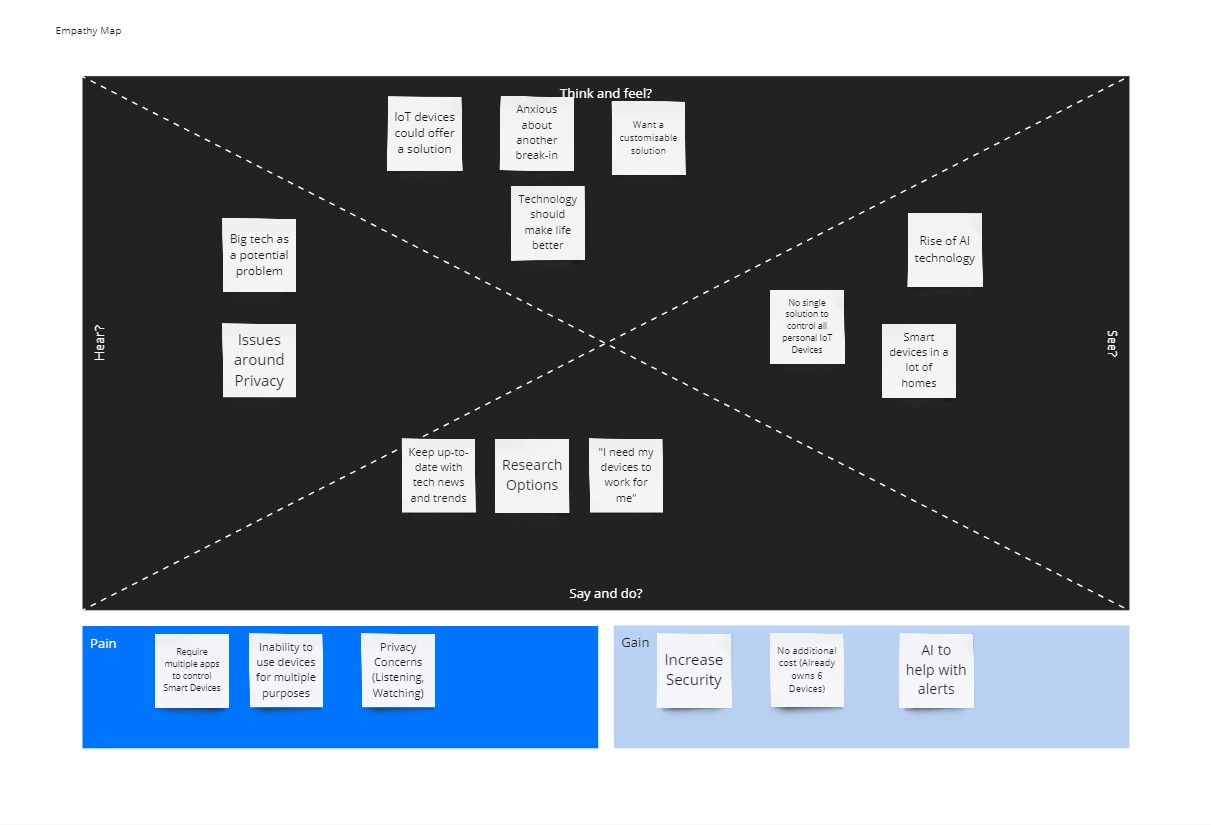
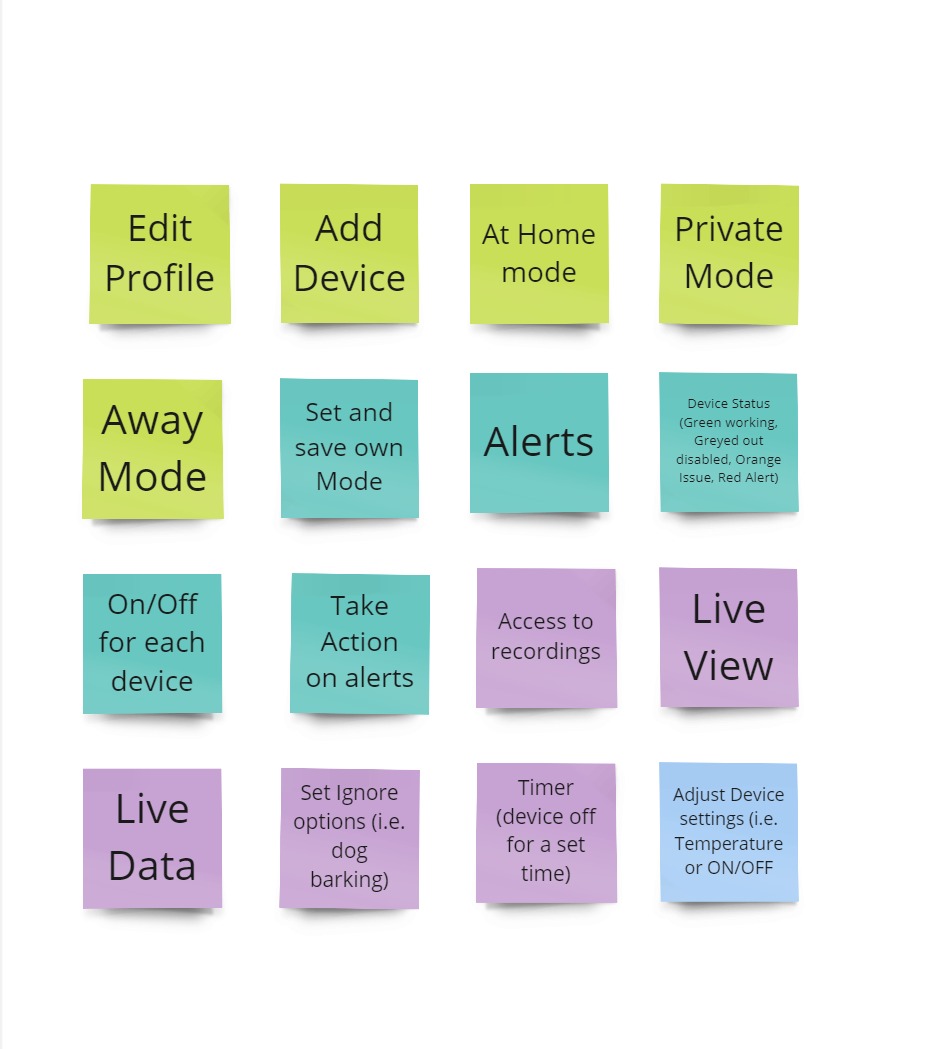
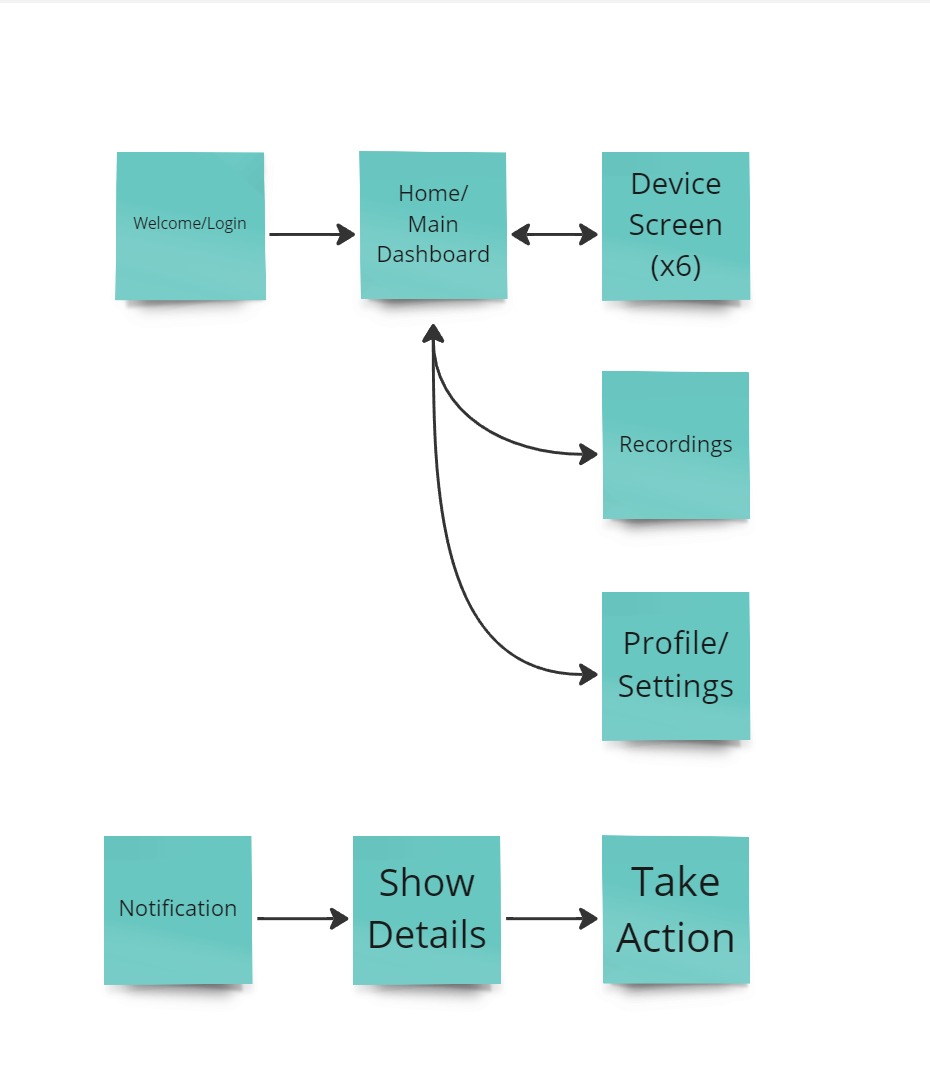
Now that I had got into the mindset of my users, I was able to start to work out how my dashboard would take shape as well as what features I would need to include. From this I was able to create a list of features and develop a user flow.
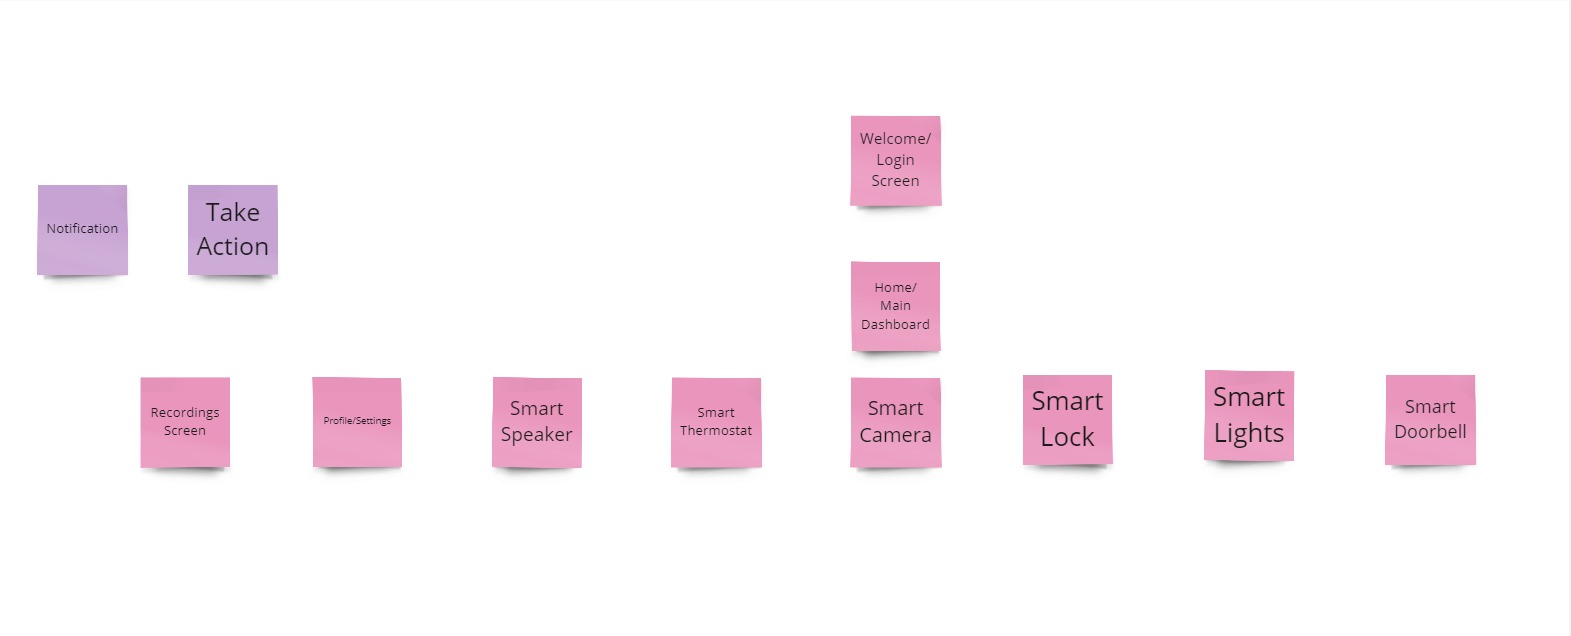
From these I was able to design my information architecture and create a site map. This site map allowed me to move on to the next stage of my design.
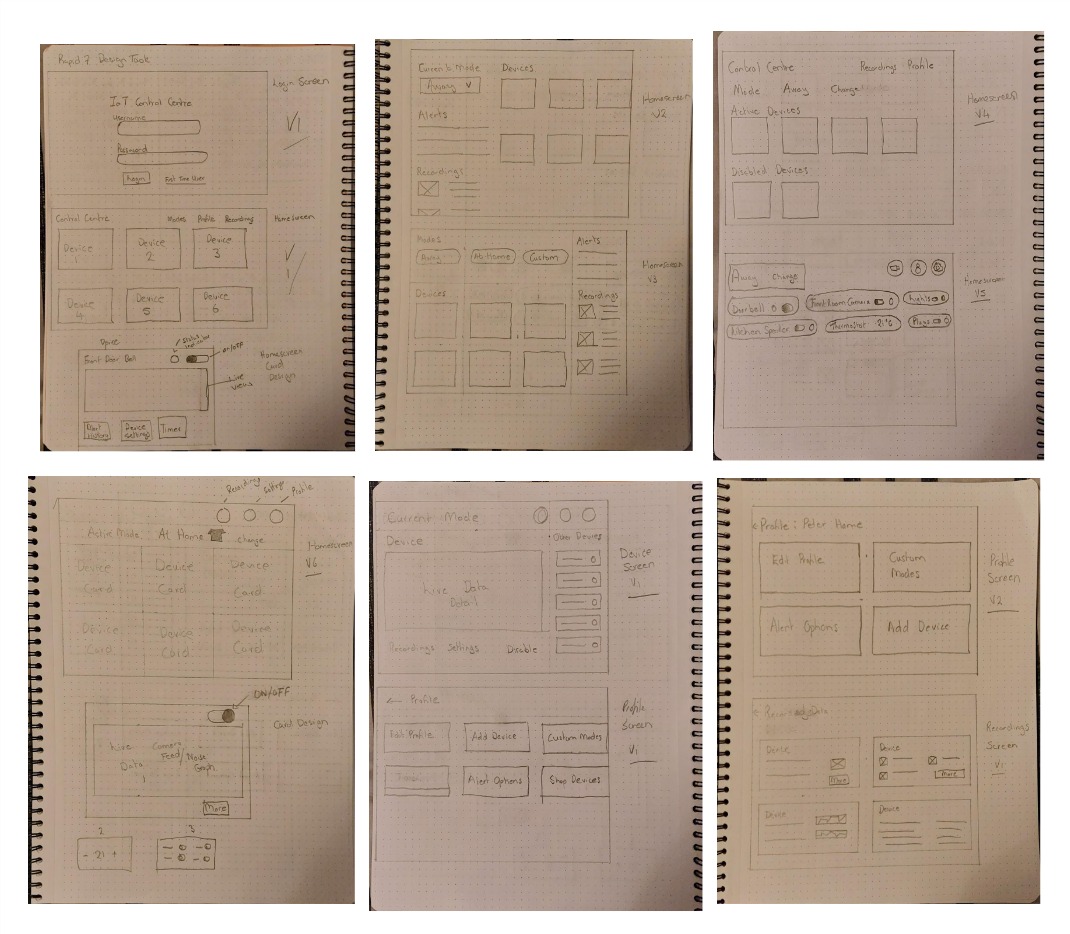
Sketches
At this stage I had the information I needed to start to sketch potential layouts for my dashboard and think about visual aspects such as hierarchy, page layout and the placement of key interface elements. I worked through multiple options and iterations before I was happy that I could move my designs into Figma and begin my lo-fi digital mockups.
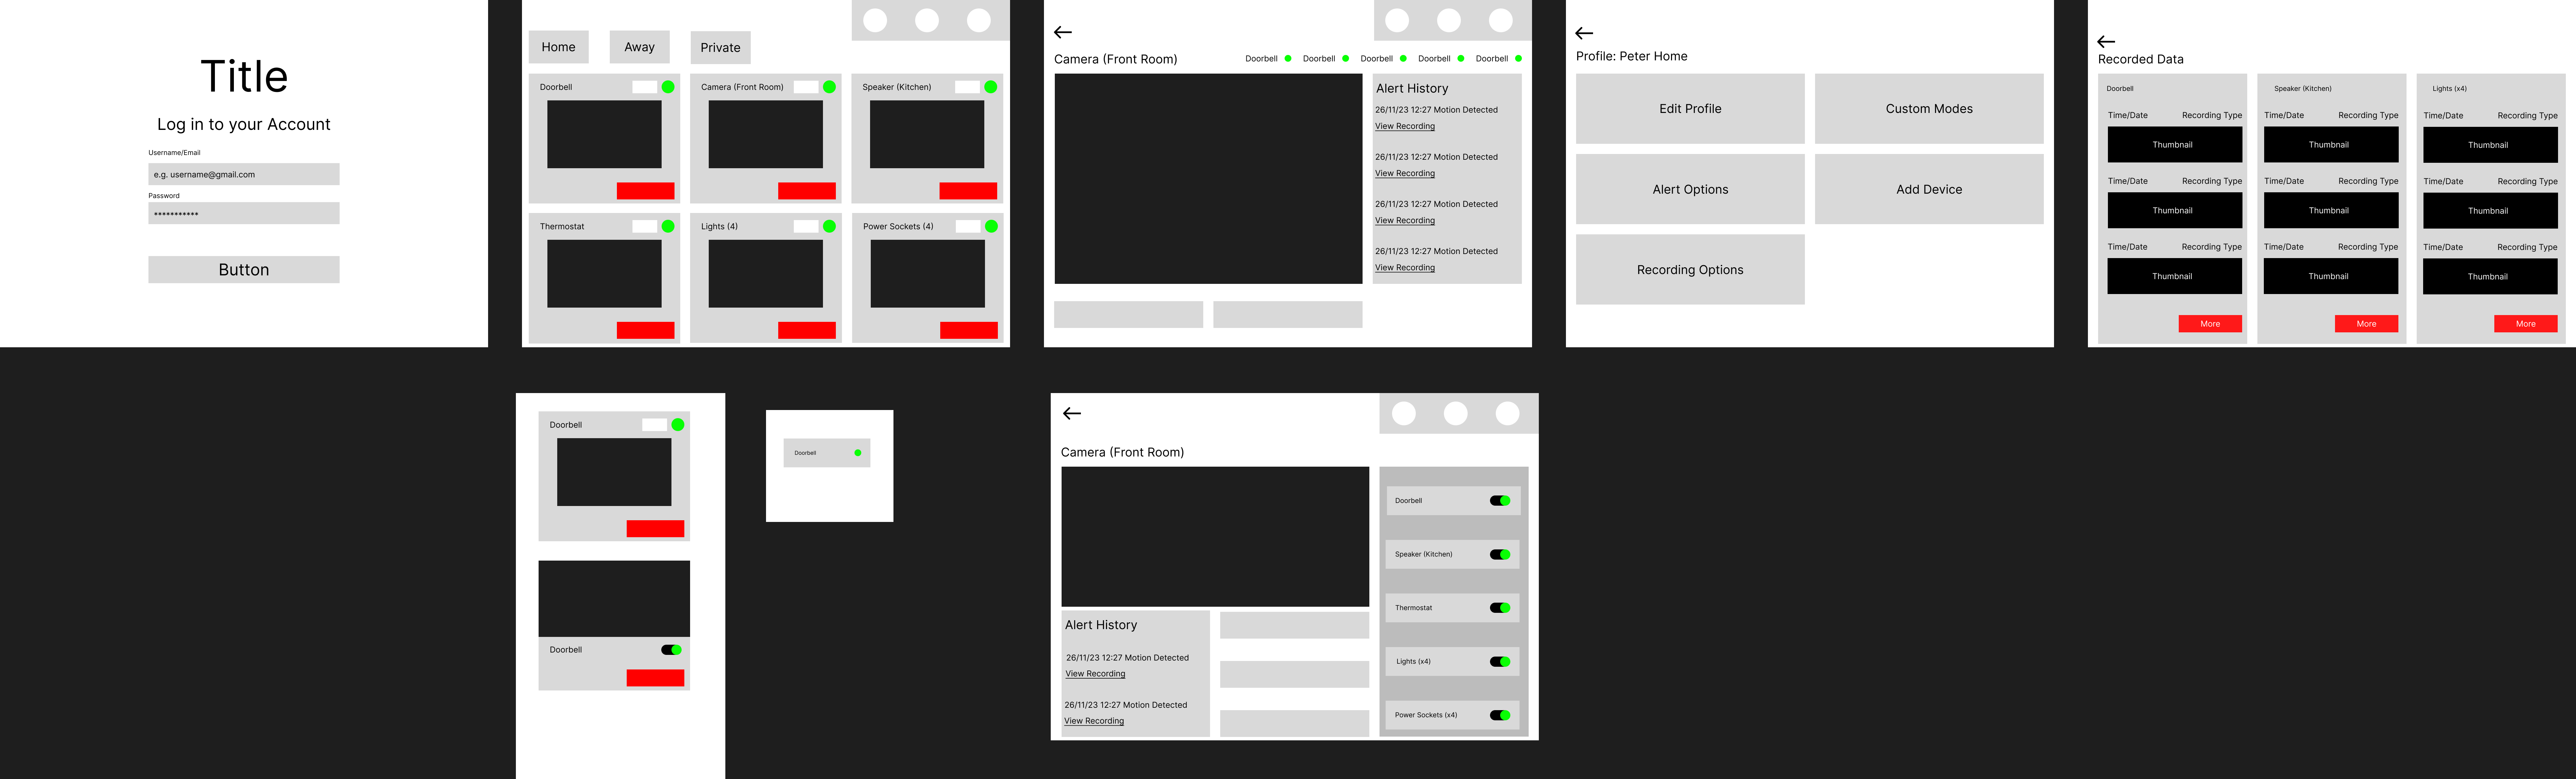
Low-Fidelity Mockups
By combining the best elements of my sketches I was now able to move the design into Figma and create more detailed mockups. This allowed me to consider aspects such as font size, padding and image size to finalise my layout before adding the visual styling.
Style Guide and High Fidelity Mockups
I now needed to decide on the visual style of my dashboard, I knew I wanted to keep my design minimalist and functional but, it still needed to look attractive and be easy to use.
I selected a solid sans-serif typeface for easy readability at a glance and used a dark background as dark mode is popular with tech-savvy people like my target market. I selected accent colours that stuck with people’s mental models and assumptions (for example red for danger) and used an orange to help interactive buttons draw the attention of users.
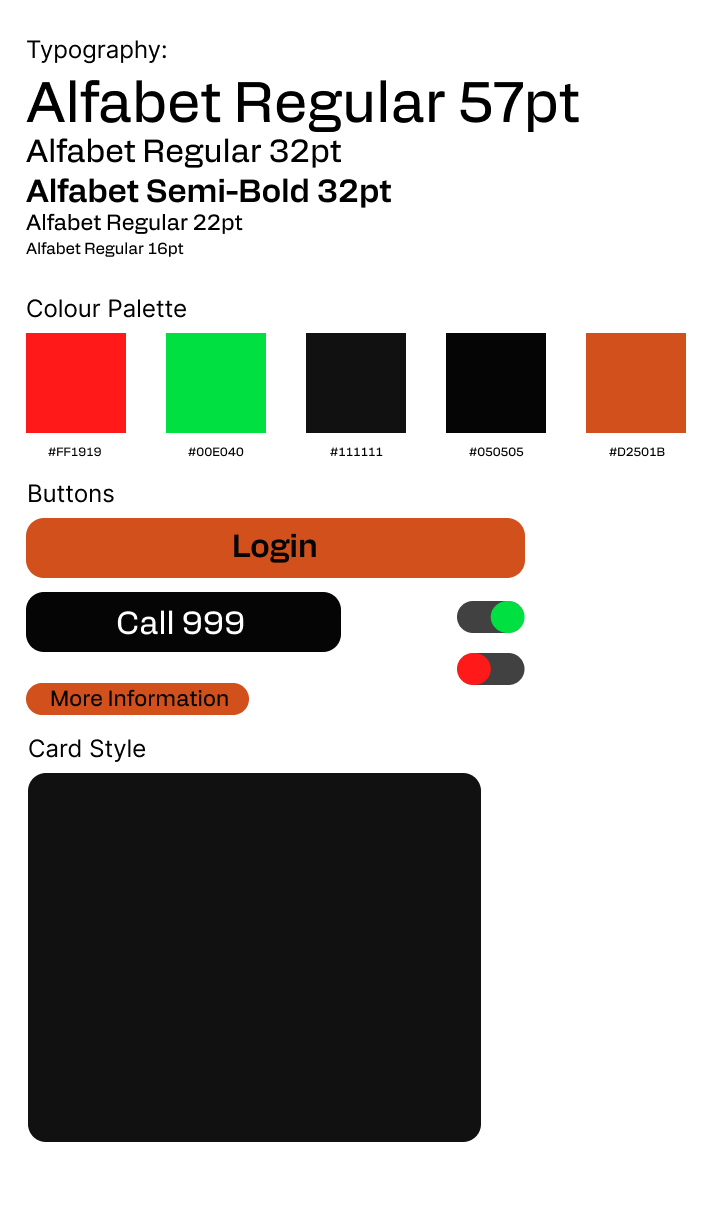
With my lo-fi mockups and style guide in place I was able to develop my hi-fi mockups with reasonable ease and limited changes. I then used the Stark accessibility Figma plug-in to check that my designs met accessibility standards, especially for colour contrast. I discovered that white text on an orange background did not meet the required accessibility standard, so I had to change the text labels on my buttons to black.
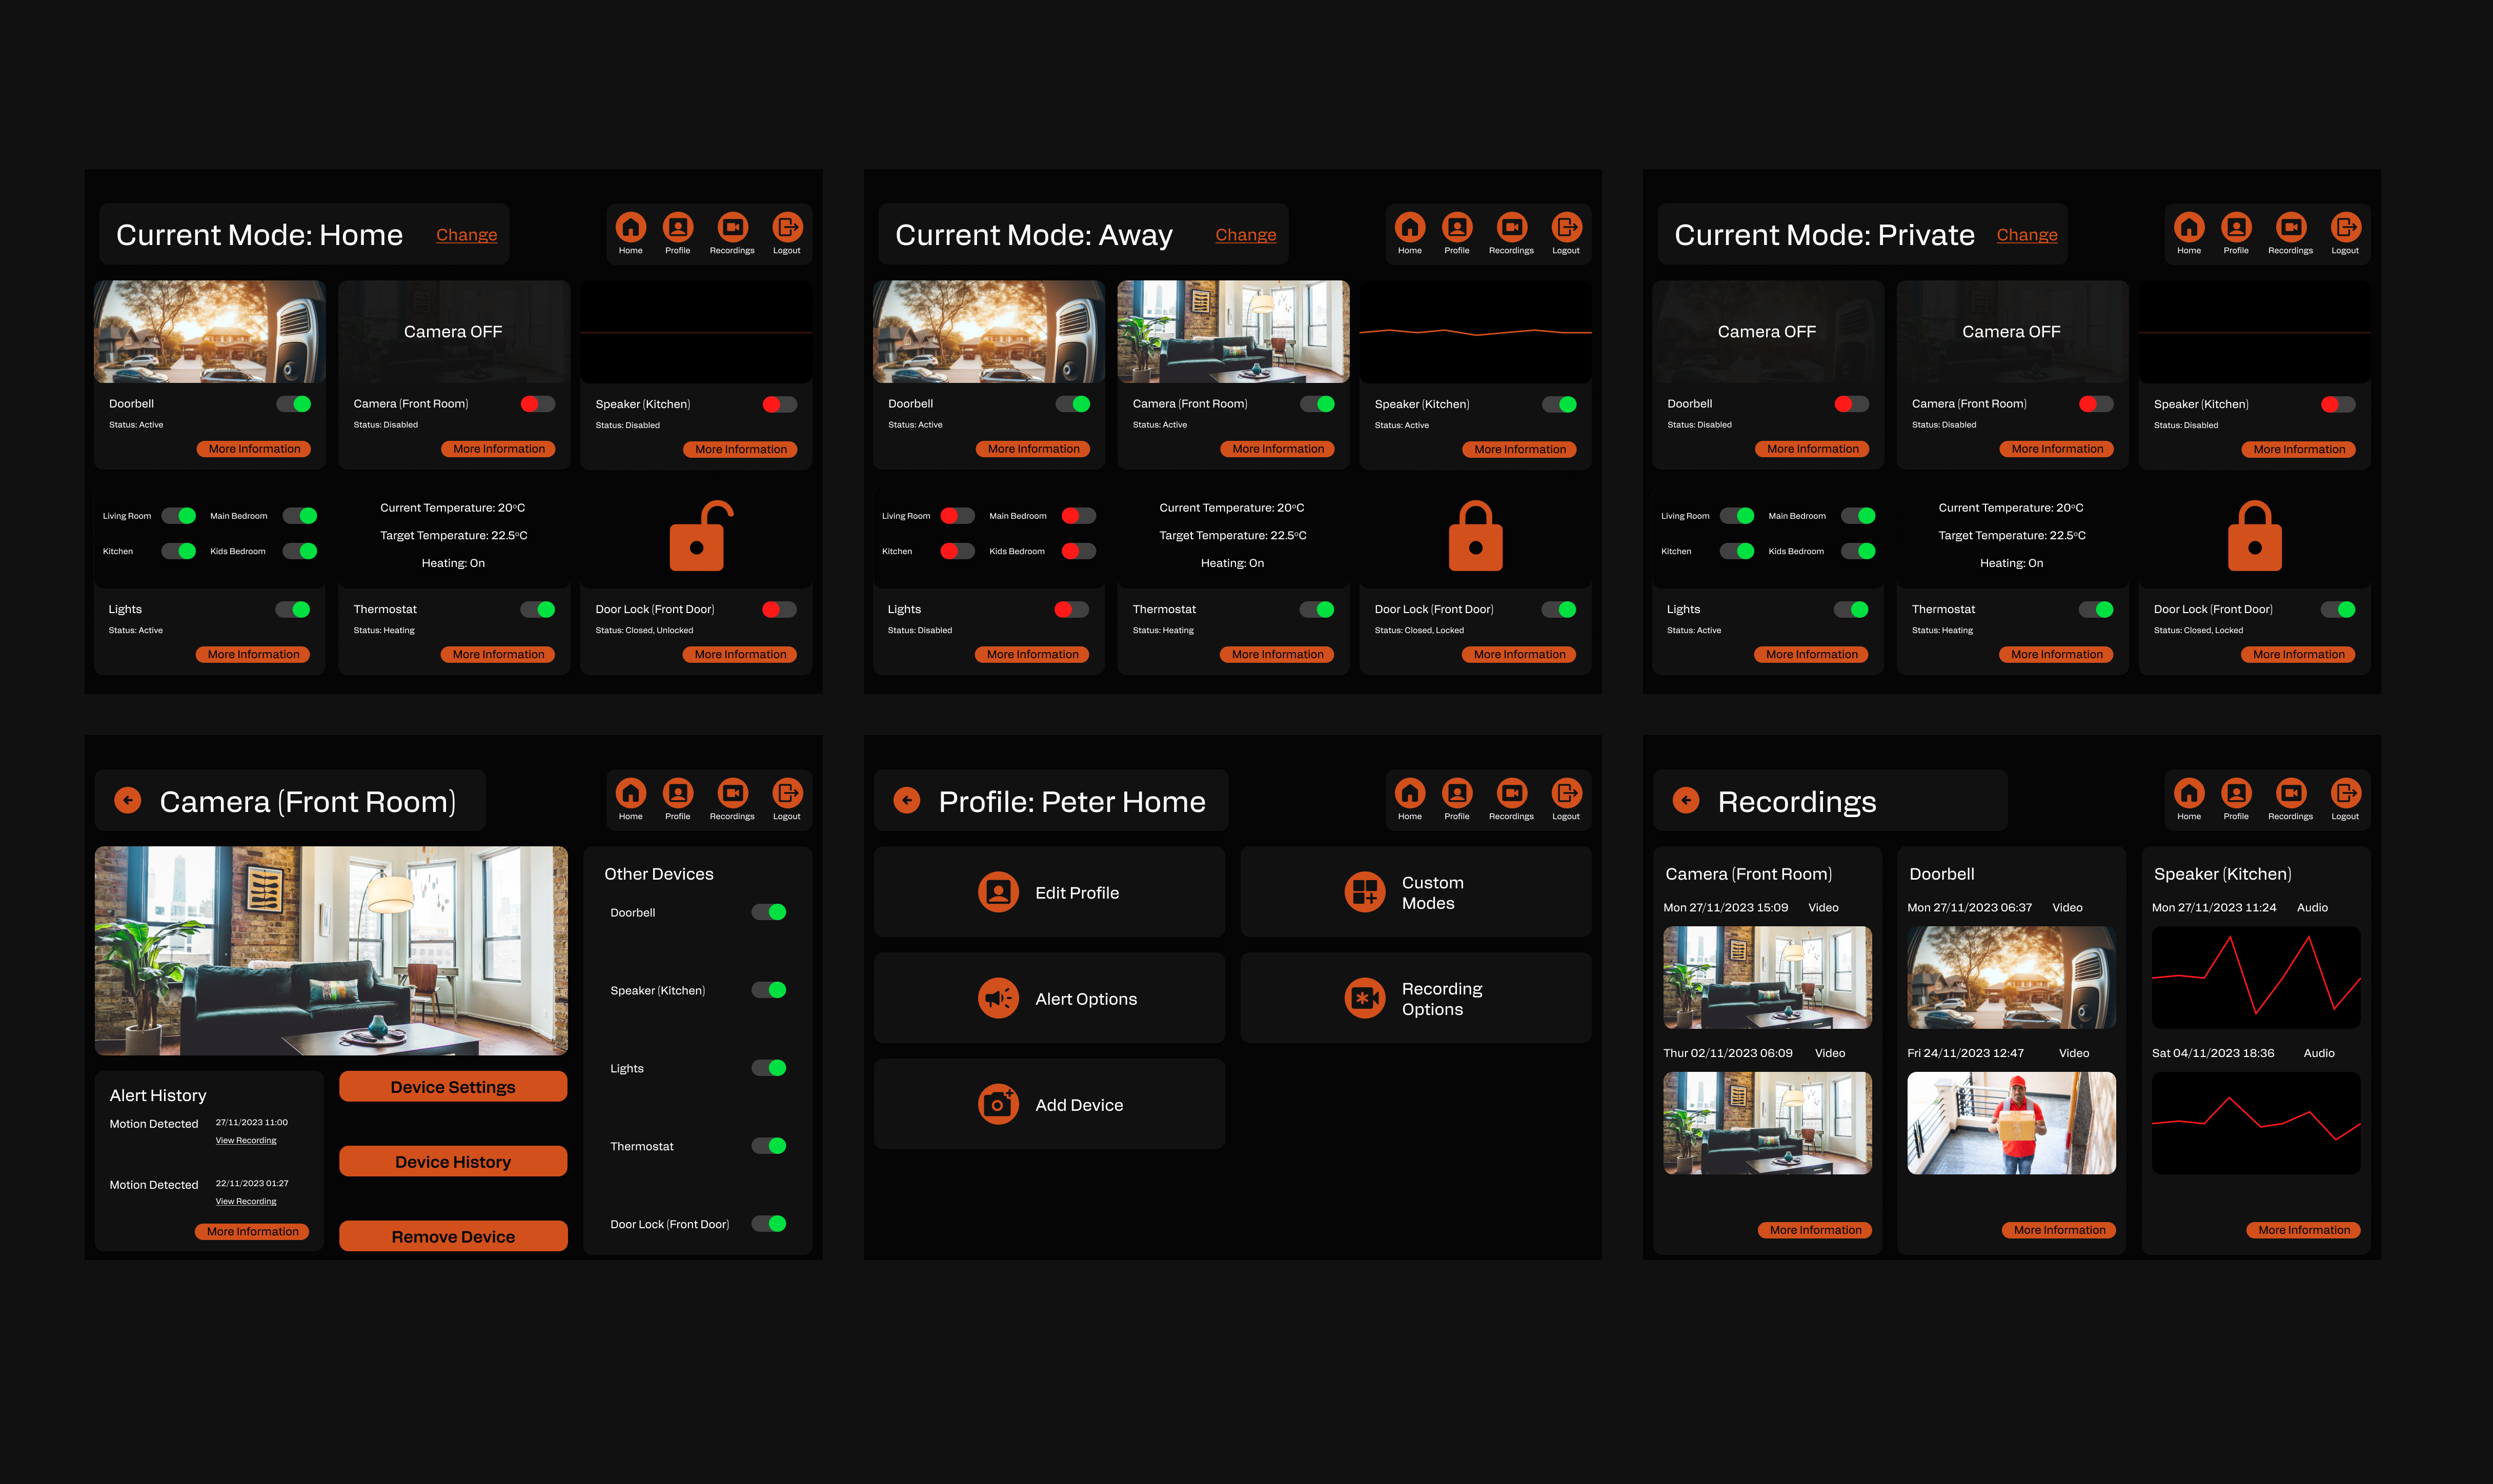
Prototype
I was now in a position to prototype my final design using Figma’s prototyping tools. As this was a prototype that I expected people to use alongside other tasks, when alerted or just check quickly, I made the decision to keep the interactions simple and not use fancy transitions. I chose to make my design functional at its core. I did also prototype the alerts a user would receive and how the dashboard would look when an alert was happening.
Feel free to have a look at my Figma File
Outcomes
I have created a full prototype of my design for an IoT Control Centre which is now ready for user testing. I also developed a slide deck of the process, for presenting at a job interview. After user testing my prototype, I will use the feedback from the tests to iterate on my design.
I presented my design at a job interview in November 2023 and was offered the position.
Lessons
This was a project with a very tight deadline and as it was for a job interview I placed a lot of importance on it. This created a lot of pressure and I found that I could work well under pressure and still achieve a high quality result. I also learnt that you need to balance your time wisely, I was also continuing with my university studies alongside this project and I did fall behind schedule with those. I feel for future projects developing a clearer plan of action with the time I would dedicate to each project would be beneficial.
Another important lesson I learnt was that when you do have a tight deadline sometimes you have to find alternative ways of working. I always like to do user research for my projects, however, with only two weeks from start to finish this proved impossible on this occasion. I needed an alternative way of getting a picture of my users and their needs and this is where ChatGPT came in. I would not describe ChatGPT in any way a substitute for user research but it did offer me insights into my users that I would not have came up with. It also gave me something with which to challenge my assumptions. I would definitely use it again to get me started on a project or while waiting on user research. I would also like at some point to compare a ChatGPT response to the results of user research to test its accuracy.